


Stable Diffusion Locally-Beginner's First Step with ComfyUI Tool
Beginner guide to Stable Diffusion and use locally or your own way. Cover ComfyUI and Stable Diffusion 3 Medium

Stable diffusion models are powerful generative AI models that allow us to flex our creativity via visual arts. Additionally, some of these models, if not most, are available publicly, i.e. open-source. In this article, we provide a guide to setup ComfyUI, a tool that makes it easy to use stable diffusion models, specifically we will demo with a recently released Stable Diffusion 3 Medium (as of June 2024).
ComfyUI is an open-source UI tool that allows users to manage and interact with these models, i.e. enabling creativity to be realized. It is awesome in a way that users can see a workflow in modules. It also can provides backend engine as well.
ComfyUI Setup
We will guide you quickly through how to install pythonic ComfyUI, at least specific to a M1 Apple Silicon MacBook Pro that we have. Detail installation guide can be found at ComfyUI’s repo.
Create a python environment. I would choose python version 3.10.6, which is a version that AUTOMATIC1111 (see our guide to install AUTOMATIC1111 here) needs as well, in case you want to try using the same environment.
conda create -n comfyui python=3.10.6Then, activate the environment with
conda activate comfyuiFor Apple Silicon, install pytorch nightly
pip install --pre torch torchvision torchaudio --extra-index-url https://download.pytorch.org/whl/nightly/cpuClone the ComfyUI repo
git clone https://github.com/comfyanonymous/ComfyUI.gitEnter the clone folder and install required libraries
pip install -r requirements.txtDownload models you want and put them in the right folders under
ComfyUI/models.In this case, we are interested in trying Stable Diffusion 3 Medium where we can download from HuggingFace. Once downloaded, put the model in
ComfyUI/models/checkpointsfolder.Then, you run the module with
python main.pyYou may use the following flags:
--cpu, if you do not have GPU
--lowvram if you want to use GPU with memory below 3 GB
If successful, we will get a link to http://127.0.0.1:8188 to open in a browser like below.
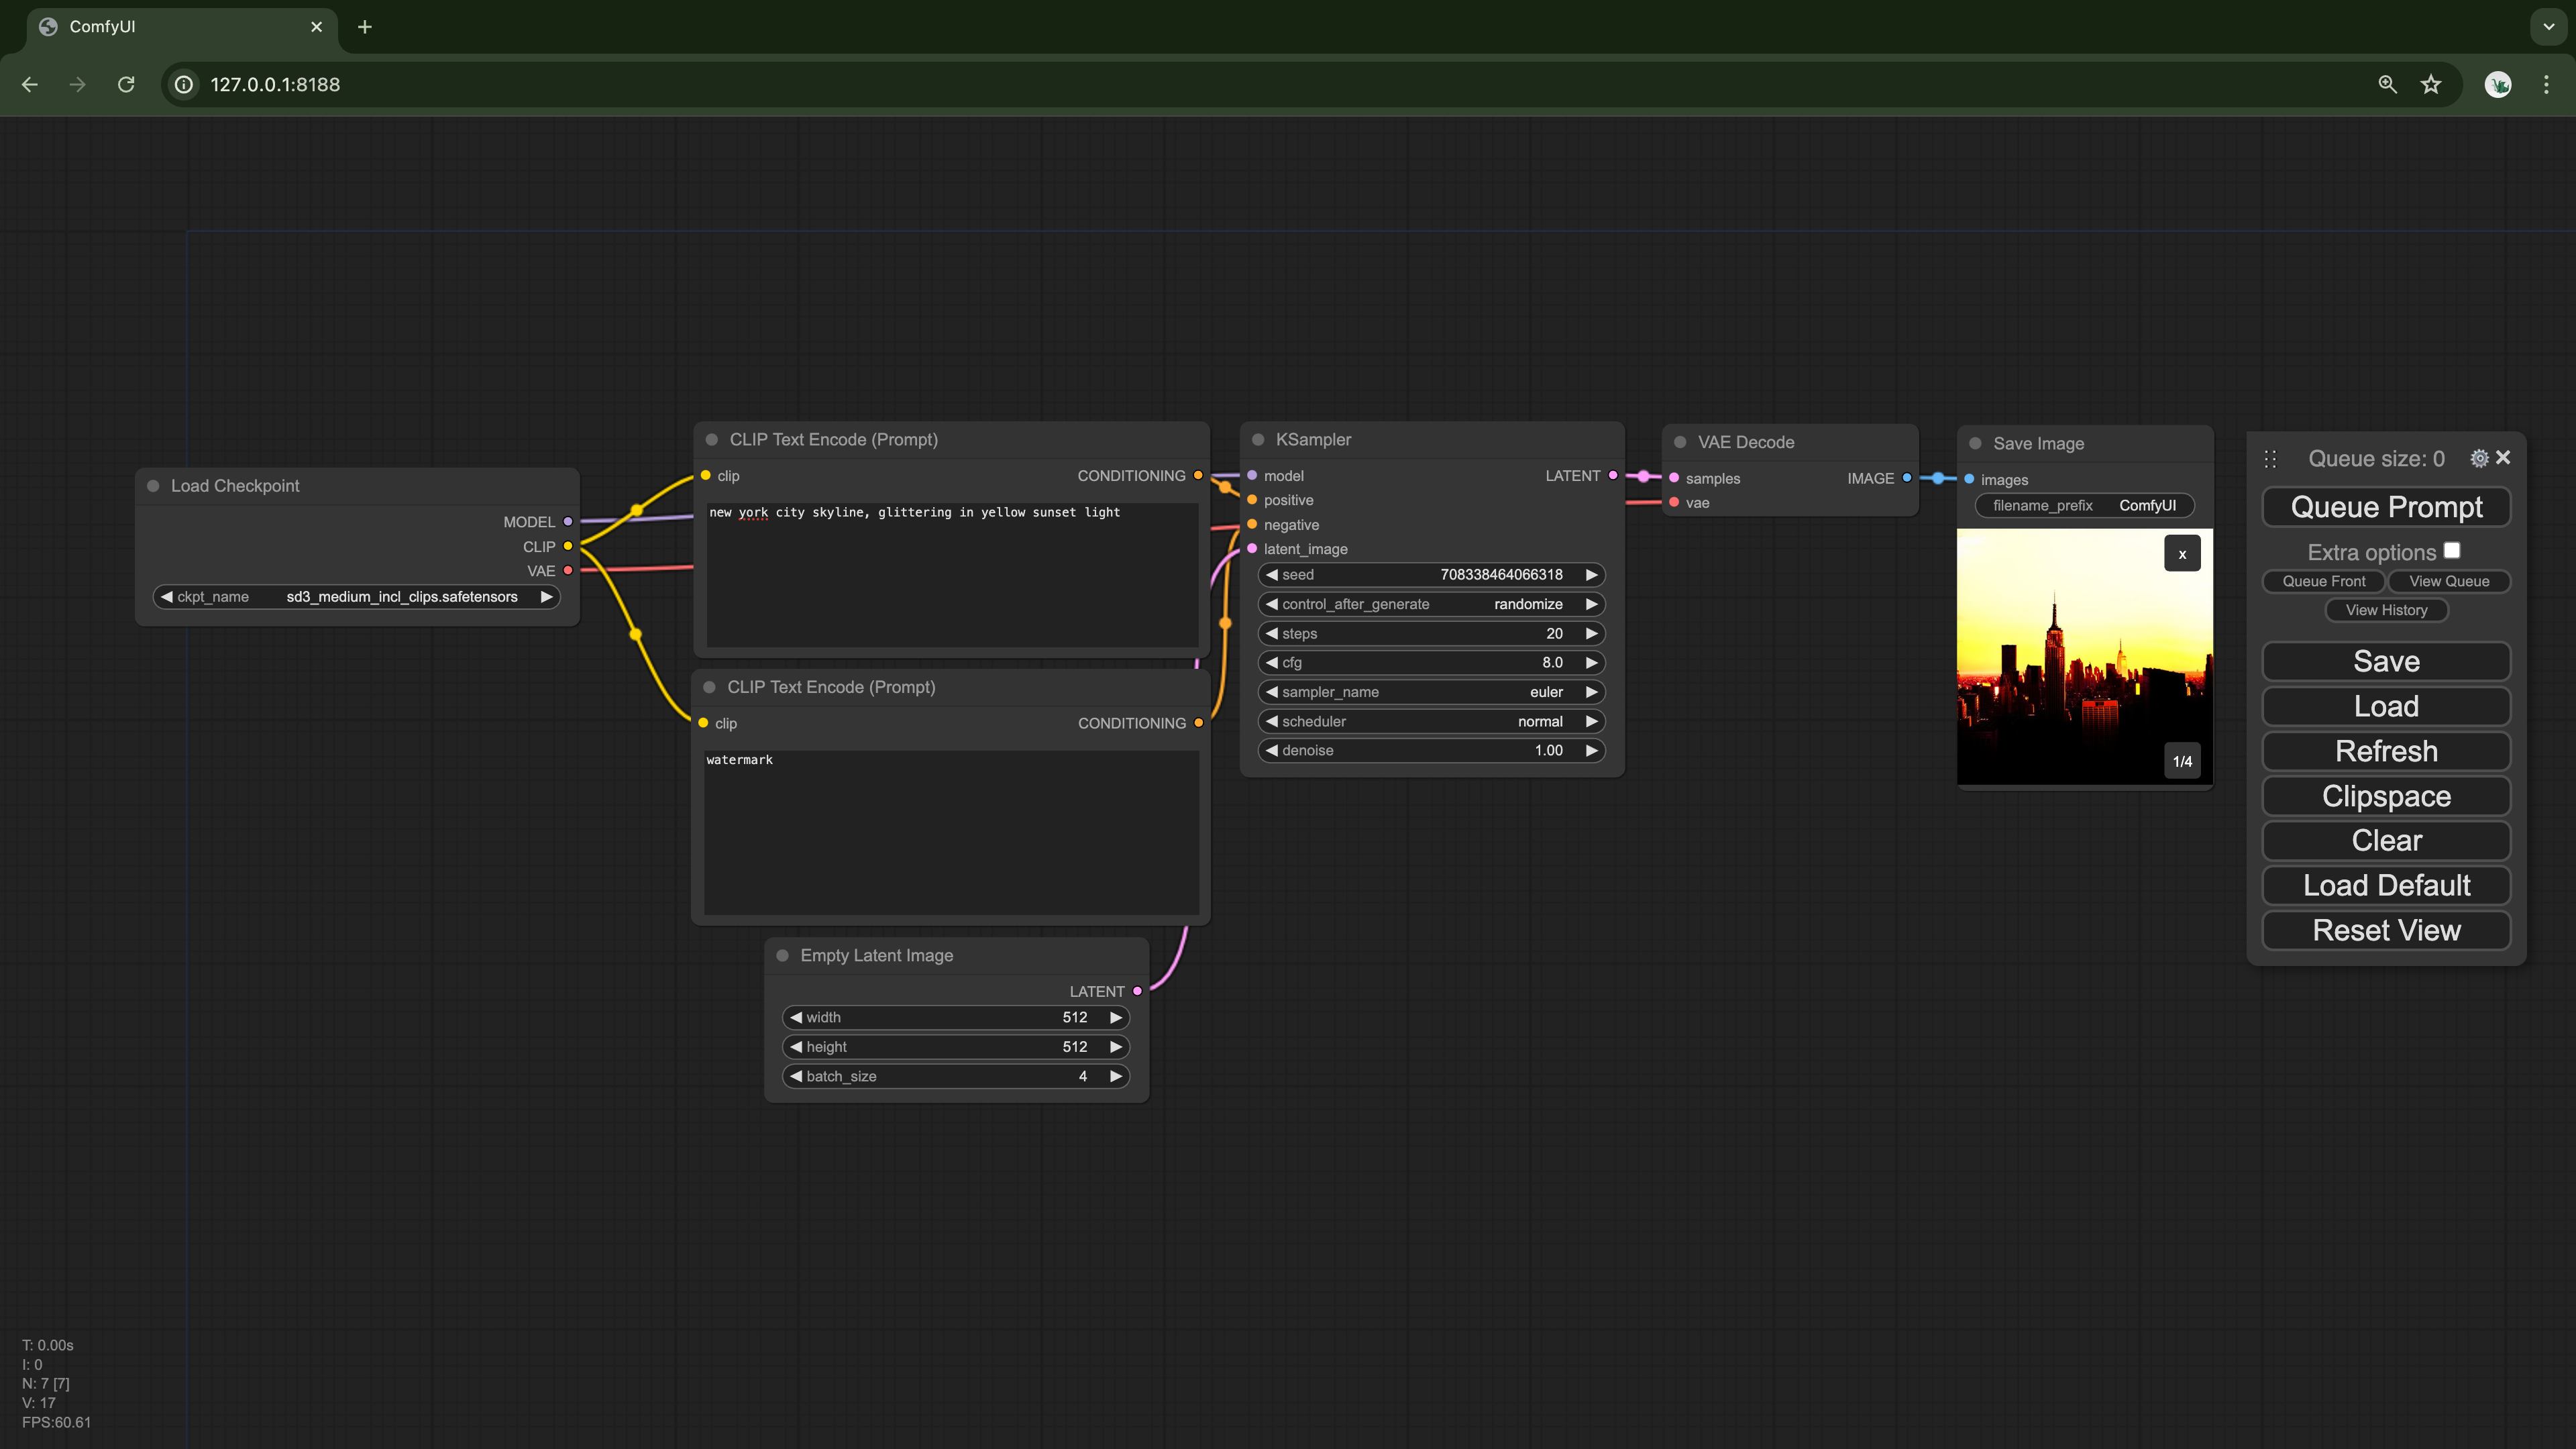
How to Use ComfyUI for Beginners
ComfyUI is a modular workflow. You can select parameters of these workflow nodes.
Once happy with settings, hit ‘Queue Prompt’ to start the compute.
You can save and load workflow, or even load default and reset the view.
Right-click on the image to save the image file.